Branding the Omnis runtime
This guide explains how to change the icon, name, version, copyright, company and other identifying information in the Omnis runtime to match your app.
These instructions are written for Omnis Studio 10.0 or later but may be adapted to previous versions.
Topics
- Tools
- Icon: Requirements
- Icon: macOS
- Icon: Windows
- App Name, Copyright, and Version: macOS
- App Name, Copyright, and Version: Windows
Tools
Where possible this guide will use tools built-in to the operating system or free tools. However, customizing the Windows runtime requires a resource editor, and a commercial tool may be required to produce the desired results.
This guide will use Resource Tuner 2, but an alternate resource editor may work.
If you want to automate these tasks then consider licensing Resource Tuner Console. Many of these steps can be programmed into a script that Resource Tuner Console can use to brand new Omnis runtimes.
Icon Requirements
For both macOS and Windows you will need your application icon in a number of resolutions. You can use a single large icon and convert it to smaller sizes, or create individual sizes with varying levels of detail.
In all cases it’s best to use a PNG file.
Using a single file
- 1024x1024
Using individual files
- 16x16
- 32x32
- 48x48 (Windows only)
- 64x64
- 128x128
- 256x256
- 512x512
- 1024x1024
Icon: macOS
The application icon is managed through a .icns file which contains the icon in numerous sizes. There is a built-in iconutil command that can make a .icns file
from a folder containing individual files at different sizes. This folder is called an iconset.
Start by creating the iconset folder as omnis.iconset on your Desktop using either the Finder or the Terminal:
mkdir ~/Desktop/omnis.iconset
Put your icons in the omnis.iconset folder using these names and sizes:
| Name | Size |
|---|---|
icon_16x16.png |
16x16 |
icon_16x16@2x.png |
32x32 |
icon_32x32.png |
32x32 |
icon_32x32@2x.png |
64x64 |
icon_128x128.png |
128x128 |
icon_128x128@2x.png |
256x256 |
icon_256x256.png |
256x256 |
icon_256x256@2x.png |
512x512 |
icon_512x512.png |
512x512 |
icon_512x512@2x.png |
1024x1024 |
If using a single image, copy it into omnis.iconset as icon_512x512@2x.png. You can then run these commands in the terminal to create the additional sizes:
sips -Z 512 ~/Desktop/omnis.iconset/icon_512x512@2x.png --out ~/Desktop/omnis.iconset/icon_512x512.png
cp ~/Desktop/omnis.iconset/icon_512x512.png ~/Desktop/omnis.iconset/icon_256x256@2x.png
sips -Z 256 ~/Desktop/omnis.iconset/icon_512x512@2x.png --out ~/Desktop/omnis.iconset/icon_256x256.png
cp ~/Desktop/omnis.iconset/icon_256x256.png ~/Desktop/omnis.iconset/icon_128x128@2x.png
sips -Z 128 ~/Desktop/omnis.iconset/icon_512x512@2x.png --out ~/Desktop/omnis.iconset/icon_128x128.png
cp ~/Desktop/omnis.iconset/icon_128x128.png ~/Desktop/omnis.iconset/icon_64x64@2x.png
sips -Z 64 ~/Desktop/omnis.iconset/icon_512x512@2x.png --out ~/Desktop/omnis.iconset/icon_64x64.png
cp ~/Desktop/omnis.iconset/icon_64x64.png ~/Desktop/omnis.iconset/icon_32x32@2x.png
sips -Z 32 ~/Desktop/omnis.iconset/icon_512x512@2x.png --out ~/Desktop/omnis.iconset/icon_32x32.png
cp ~/Desktop/omnis.iconset/icon_32x32.png ~/Desktop/omnis.iconset/icon_16x16@2x.png
sips -Z 16 ~/Desktop/omnis.iconset/icon_512x512@2x.png --out ~/Desktop/omnis.iconset/icon_16x16.png
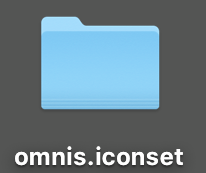
You should end up with a folder that looks like this:
![]()
You can now make your omnis.icns file using the iconutil command:
iconutil -c icns ~/Desktop/omnis.iconset
This will produce a omnis.icns file you can use to brand your runtime.

This file should be placed in your runtime under Contents/Resources/omnis.icns and will change the icon on the runtime.
![]()
Icon: Windows
There are three locations on Windows that need the icon updated:
omnis.exeomnisdat.dll- Icon 2033 in your iconset
omnis.exe and omnisdat.dll need to be modified with Resource Tuner or another resource editor. These require a .ico file containing various sizes of your icon.
The iconset icons can simply be replaced on disk using the appropriately-sized PNG files.
An easy way build the .ico file is a web-based tool that resizes and packages a .png into a .ico, such as icoconvert.com. To use icoconvert.com upload a PNG of your icon that is at least 256x256.
Under the icon format choose Custom sizes, then Multi-size in one icon. Check these sizes:
- 16x16
- 32x32
- 48x48
- 64x64
- 256x256
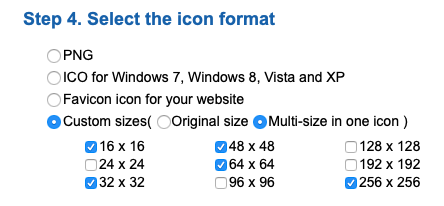
Click the Convert ICO button, then download your icon.
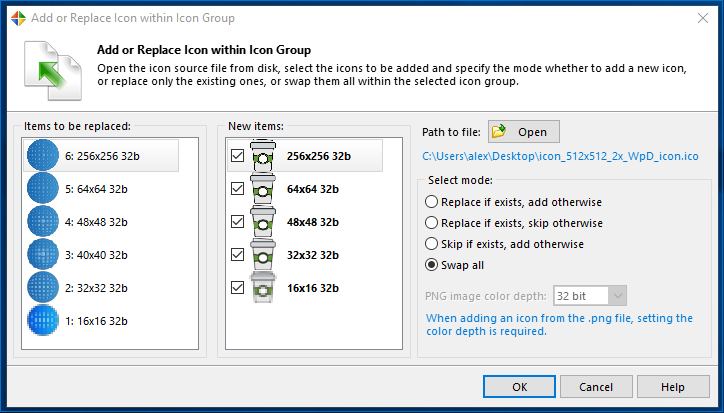
To apply the icons, open omnis.exe with Resource Tuner. Navigate to Icon Group, then 5: English (United Kingdom). Right-click on this entry and choose Resource Tools then Add or Replace Icon within Icon Group.
![]()
Click Open on the dialog that appears and select the .ico file you downloaded. Choose the Swap all option and click OK.
Save your changes in Resource Tuner.

Repeat these steps in Resource Tuner to change the icons in omnisdat.dll. If you are deploying both 32-bit and 64-bit runtimes, you will need to apply these steps to these two files for each architecture.
The final icon to customize is the one appearing in the top left corner of the Omnis application window. This is managed with the Omnis iconsets introduced in Studio 8.0 through the icon with ID 2033.
To customize this icon you need to replace these PNG files in the studio iconset with files containing your icon:
| Name | Size |
|---|---|
omnis_2033_16x16.png |
16x16 |
omnis_2033_16x16_2x.png |
32x32 |
omnis_2033_32x32.png |
32x32 |
omnis_2033_32x32_2x.png |
64x64 |
omnis_2033_48x48.png |
48x48 |
omnis_2033_48x48_2x.png |
96x96 |
App Name, Copyright, and Version: macOS
There are four places to rename the Omnis runtime to have your app’s name, company, copyright, and version:
- The
.appbundle - The main
Info.plistfile - The
InfoPlist.stringsfile for each bundled language - The
Localizable.stringsfile for each bundled language
App bundle
Rename the app bundle to have your application’s name by as changing the application name in the Finder.
Info.plist and InfoPlist.strings
The Info.plist file is found inside the app bundle at Contents/Info.plist and can be edited with a text editor or Xcode. There is an InfoPlist.strings file in Contents/Resources/[language].lproj/ for each language you support in your application. For English, the path is Contents/Resources/English.lproj/InfoPlist.strings. For French, it would be Contents/Resources/French.lproj/InfoPlist.strings, and so on.
You must retain the primary Info.plist file and folders for each language you wish to support. If you do not plan to support all included languages, you can remove the corresponding folder from Contents/Resources. You should always retain English.lproj since that is the primary language used when developing Omnis Studio.
Each of these files contains one or more keys you need to adjust to contain your application’s branding. The keys listed in this table link to Apple’s documentation on that specific key.
| Key | Purpose |
|---|---|
CFBundleGetInfoString |
A string with the copyright notice for the bundle. Apple replaces this key with NSHumanReadableCopyright, but Omnis still uses CFBundleGetInfoString |
CFBundleIdentifier |
A unique identifier for your app used by the OS (*see note below) |
CFBundleName |
The short name of the bundle, less than 16 characters |
CFBundleShortVersionString |
Your app’s version followed by the copyright |
CFBundleVersion |
Your app’s version (** see note below) |
* CFBundleIdentifier should be formated as a reverse DNS string identifying your company and the bundle. For example, an app called Coffee Picker from Acme, Inc. might have a bundle identifer of:
com.acme.coffee-picker
Note the bundle identifier should only include alphanumeric (A-Z,a-z,0-9), hyphen (-), and period (.) characters per Apple’s specifications.
** CFBundleVersion uses three non-negative, period-separated integers with the first integer being greater than zero—for example, 3.1.2. See Apple’s documentation for details on the meaning of each number.
Localizable.strings
This file is located at Contents/Resources/English.lproj/Localizable.strings and can be edited with a text editor or Xcode. Adjust these entries:
| Entry | Value |
|---|---|
CORE_RES_1 |
Application name |
CORE_RES_577 |
Application name. This affects the application menu entries |
CORE_RES_25599 |
The folder under ~/Library/Application Support where your application data will be stored |
CORE_RES_29300 |
Application name. This affects the dialog that appears when Omnis copies firstruninstall to the application data directory in Studio 10.2 and later |
App Name, Copyright, and Version: Windows
There are two locations to customize the Windows runtime with your application name:
omnis.exeomnisdat.dll
omnis.exe
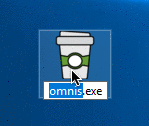
Rename the omnis.exe file to use your app’s name. This can be accomplished in Windows File Explorer.
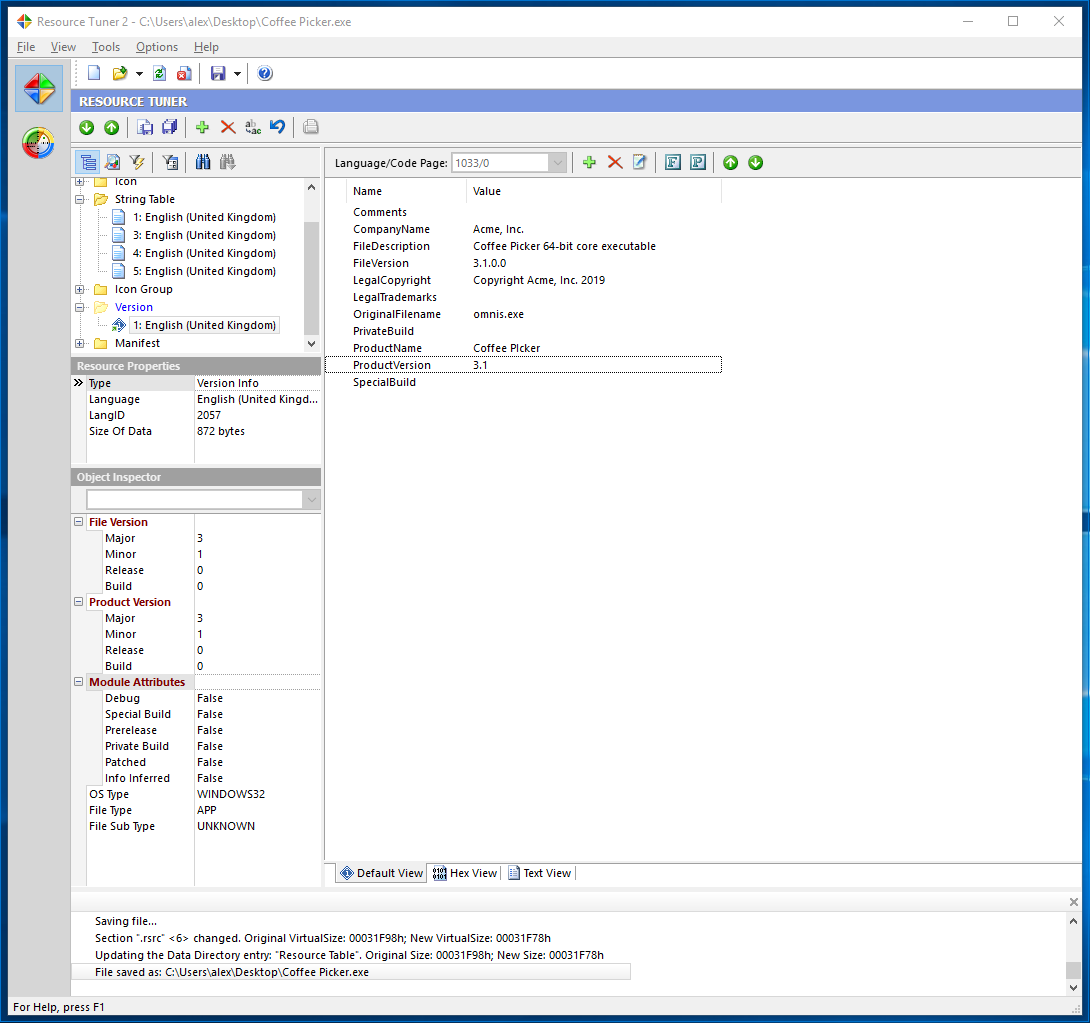
Edit your exe file with a resource editor like Resource Tuner. There are several entries to edit with your application name under Version 1:
| String | Value |
|---|---|
FileVersion |
Your version formatted with 4 numbers. Use a 0 for extra numbers, such as 3.1.0.0 for version 3.1 |
ProductVersion |
Your version without extra formatting |
CompanyName |
Your company’s name |
FileDescription |
Your application’s name followed by the architecture and “core executable” |
LegalCopyright |
Your copyright |
ProductName |
Your application’s name |
Also set the File Version and Product Version data. In Resource Tuner this is available after selecting Version 1 in the lower left-hand corner under Object Inspector. These values should match the FileVersion and ProductVersion strings.
omnisdat.dll
You need to rename the omnisdat.dll file using a specific convention based on your custom name for omnis.exe. Use the first 5 characters from your renamed omnis.exe file name, then add dat.dll to get the new name for omnisdat.dll.
For example, if you rename omnis.exe to Coffee Picker.dll change the omnisdat.dll file to Coffedat.dll.
Similarly if you rename omnis.exe to something with less than 5 characters such as abc.exe, change the omnisdat.dll file to abcdat.dll.
Edit your renamed omnisdat.dll file with a resource editor like Resource Tuner. There are two entries to change under String Table.
| String Table | ID | Value |
|---|---|---|
| 1 | 1 | Your application’s name |
| 32 | 499 | The folder under %LOCALAPPDATA% where your application data will be stored |
| 1832 | 29300 | Your application’s name. This affects the dialog that appears when Omnis copies firstruninstall to the application data directory in Studio 10.2 and later |